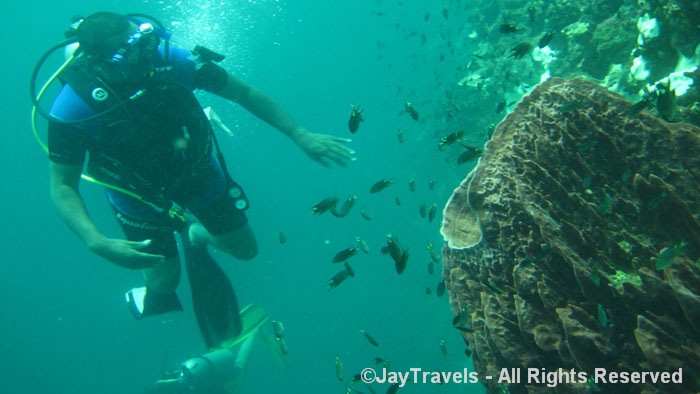
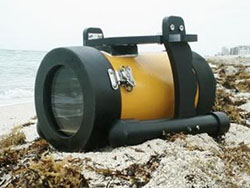
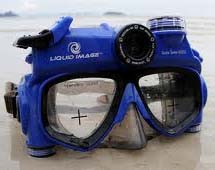
 Those of you who know me personally know I am really getting into this Scuba Diving thing. Scuba Diving gives you a feeling of weightlessness or floating without the danger of jumping out of an airplane at 10,000ft. In addition, there is literally an entire world to explore in the sea – everything from mammals/reptiles of all sizes, beautiful plant life and sunken treasures. Since most video cameras are not waterproof, special equipment must be used by divers to capture these fascinating moments. I’ve already reviewed one method of recording video underwater – the Nemo 200 Underwater Camera housing. While the Nemo 200 is certainly an excellent option due to its budget friendly price tag and support for almost any current video camera – its size and weight makes it unpractical in many instances. Enter a new option – a scuba mask with a built-in video camera. That’s right; free your hands (and your suitcase) while you concentrate on diving and record either pictures or high-quality HD video everywhere you turn your head. This Travel Gadget Review will focus on whether the Liquid Image HD320 Scuba Mask can actually deliver on these claims.
Product Summary
The Good
- 720p widescreen HD h.264 video
- Waterproof down to the recreational diver limit of 130ft/40m
- Takes HD video and 5mp still shots.
- Auto-white balance and support for Blue/Green water filters and two side headlamps.
The Bad
- Underwater adjustments such as zoom, color correction, etc. not possible
- Tricky lining up shot using in mask hash marks
- Mask can vibrate during exhale and/or bubbles can obscure lens
Made By
Liquid Image LLC.
Cost
$250 US street
Warranty
90 Days
Website
Liquid Image HD 320
Grade:


Design
 Unlike my Nemo 200, the HD320 doesn’t take any more space than a regular scuba mask – so there’s no need for me to bring along (and pay for) an additional piece of luggage. Even though the build quality of the HD320 feels sturdy, the fact that it’s mostly plastic may not make it suitable for extreme cold water dives. The HD320 comes in two sizes – medium and large and you can get it in any color you like – so long as it’s blue. I don’t personally have a problem with this, but I know several divers who believe looking good (read: color coordination) is just as important as actually diving well – and blue may not go with that day’s outfit. SMH….
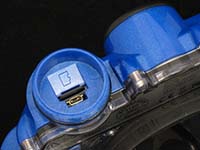
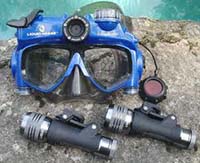
On the front of the tempered viewing glass are two crosshairs designed to help you line up shots underwater. I will talk about how well the crosshairs do/don’t work in the performance section, but I can say that once the mask is on your eyes automatically focus past the crosshairs and you don’t notice them. Each side of the unit stores two of the 4 required AAA batteries – which should provide around 2 hours worth of video recording. I initially thought the use of AAA batteries instead of rechargeable lithium-ion batteries was pretty lame – but the concept has grown on me and I’m actually glad Liquid Image decided to go this route (no doubt cost had something to do with it as well). If I ever forget my rechargeable AAAs or one of them becomes damaged – I could just run to any supermarket and pickup replacement alkaline versions – something I couldn’t do with Lithium batteries. The top of the mask includes the water tight compartment with a microSD card slot and a mini-USB jack for playing videos onto a HDTV. The cap to this compartment also serves as the holding space for the optional blue/green water filters while not in use.
The top-right side of the unit holds a single rocker lever that powers the device on/off, as well as switches the mode between ‘Picture’ and ‘Video’ modes. I don’t generally use the picture function – simply because there’s no way you can tell if you got the shot with the mask on underwater. It’s easier to just take video and create snapshots from it using software. To turn the mask on, you press and hold the left side of the rocker until you hear the beep. The inside of the mask contains an LCD status panel which displays the remaining battery life, number of videos/pictures recorded and the SD card status. 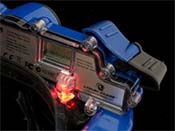 Once the mask is on, pressing the left side of the toggle will switch it between video to picture modes. Even though you cannot see any of the LCD information while the mask is on, you’ll know what mode it’s in because there’s a giant light inside of the mask. Red means it’s in picture mode and Blue means it’s in video mode. To start recording or to take a picture, press the right side of the rocker lever and the mask light will flash red once if taking a picture or continuously flash blue when shooting video.
Features
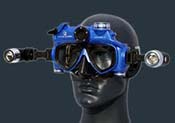
Using a camera housing underwater can be annoying as it tends to affect your buoyancy control and make your arms tired from holding them out in front to film. Other times, you want (or need) your hands to be free for safety reasons or to pick something up – like a shark’s tooth (never touch the coral). A video camera embedded in your mask eliminates all of these problems – freeing you up to enjoy the dive. Just press the record button and every direction your face is pointed the unit will record. When you have finished your dive, you can transfer the video manually to your computer or connect the included component video cable directly to any HDTV and watch the video from the mask. The HD320 also has a built-in microphone – though it records a mono soundtrack – not stereo or simulated surround sound. To me, this is not that big of deal since there’s very little to record underwater except the gurgling of your own regulator. Here’s the roundup of the Liquid Image HD320’s features:
|
|
The HD320 records to h.264 .mov format at 30 frames per second standard NTSC video. The resulting video is 1280×720 progressive scanned in 16:9 aspect ratio; there is no option to downgrade recording quality to fit more video on a microSD card. The HD320′s 5 megapixel camera creates images that are 2592×1944 pixels. You can record one hour of video for every 2GB of SD Card space you have available – so an 8GB SD Card will allow you to record about 4 hours of video. The HD320 supports up to 16 GB micro-SD cards and comes with the Windows® only ArcSoft video editing software (something I admit I never bothered even using it since Cyberlink PowerDirector does such a good job producing videos for this site). Keep in mind in order to play the HD video produced by the HD320 on your computer, it will need to be a relatively recent dual-core machine – most Netbooks will struggle to play these files correctly.
Performance
 The first thing you notice when you put on the HD320 is that you really don’t notice it; which is to say it doesn’t feel any different than most any other scuba mask. It is not heavy or unbalanced – nor does it feel cheap or overly plastic. I’ve taken the HD320 down to 85ft and there was no indication of leaking in the battery/memory card compartments whatsoever. Assuming you get the correct size for your face – you shouldn’t experience any in-mask leakage either.
All of these features sound pretty good on paper, but none of this matters if the camera embedded in the mask doesn’t work, leaks, takes awful recordings or you can’t line the shot up properly. If the resulting video is overly dark, pixilated, choppy, stutters, has sound/action sync errors or cannot properly or quickly focus on the subject in front of it – using it is a complete waste of time and money. Luckily, the HD320 was more than adequate in each of these categories – at least in optimum lighting conditions. In well lit conditions (near surface dives or external light source), the HD320’s automatic white balance does a good enough job not to overexpose most shots. Even in caves, the recorded video was somewhat grainy due to lack of light – but no pixilation or choppiness.
One accessory I strongly suggest is blue/green water filters. Attaching the $50 accessory adds the lost red back into the video and overall just makes all the colors in the video pop. Warning: the color filters require two adhesive stickers to mount onto the camera – the second is hidden inside of the base. Since there’s no instruction manual included with the filters, not attaching both plates will make the filter become unattached from the base while in the water – guaranteed. I lost one filter while in Thailand and almost another in Nassau. Liquid Image could do a better job with instructions and/or pointing this out in a FAQ section on their site. If you are going to a depth beyond what a color filter can do for you, then you can add the optional side torches at $80 apiece (I have not used the side-torches). Even though the aspect ratio of the video is widescreen 16:9, the depth of field is only 54 degrees – making the resulting video appear slightly narrow. Here is some footage from my Phuket, Thailand, Cape Town, South Africa, Coco Beach, Costa Rica and Portobelo, Panama dives taken with the Liquid Image HD320 scuba mask.
The major drawback to an on-face camera is you can’t adjust the video settings underwater like you can with some dedicated camcorders in housings, such as zoom, white balance, etc. while underwater. This puts you in the position of filming everything and ‘hoping’ the resulting video turns out okay. For the most part, everything did – but I had a difficult time lining up shots using the crosshairs on the front of the mask; in many of the shots I was filming too high. My suggestion is to practice with the mask in a pool or even just walking around the house to better gauge the recording angles. Another thing you have to account for is the mask may vibrate every time you exhale. I’ve found that I can alleviate most of this by remembering to ‘breath’ out through my regulator – not ‘blow’. Another tricky situation you have to manage is the bubbles that float to the surface from your regulator as you exhale. If you are looking down, your exhaust will likely rise to the surface from around your neck. On the other hand, if you are looking straight ahead or up – the bubbles will likely rise right in front of your face – possibly obscuring whatever it is you are filming. Some high-end regulators route the bubbles behind you – otherwise, you’ll need to make sure whatever it is you are filming is in frame while you are inhaling (never hold your breath while diving). Finally, the mask will record the direction your head is pointed – not your eyes. During my first several videos, I was still relatively new to scuba diving – so my head jerked back and forth so often during the dives that watching the resulting video made me nauseous. Obviously, your mileage may vary.
Final Thoughts
The HD320 along with the Drift x170 are my two favorite travel gadgets. There is simply no reason for me to use my Nemo 200 anymore, the HD320 is just a better fit for my diving in every way – whether that’s decrease travel costs, keeping both hands free during diving or overall portability. Nothing is perfect – the sheer nature of the mask is not suited for extreme diving conditions or professional Videography/Photography. Also, the occasional mask vibration and bubbles from exhaling can sometimes impact recordings. That said, this is one of the coolest tech gadgets on the market – not just in terms of paper specs – but real-life execution. I understand Liquid Image will be introducing a new version of this scuba mask – this time with expanded recording angle and in any color you want – so long as it’s charcoal (something I’m sure the need to look good crew will appreciate). I can’t wait to see how they will improve on this excellent underwater gadget; until then…
Happy Travels!!


